A filter integrity test confirms that no air or dust bypasses the media. This guide provides a safe, step-by-step method to isolate the unit, verify seals, and check pressure drop to ensure proper dust collector maintenance.
- Always lock out and tag out the dust collector before opening the housing for a manual integrity check.
- A visual inspection of the seal and media is the first step before applying any pressure or suction.
- A sudden change in static pressure during operation often indicates a leak before it causes a failure.
- Keep a log of test results to track wear and predict when filter media needs replacement.
Why Filter Integrity Matters
A filter integrity test confirms that the media is doing its job. If the seal fails or the fabric tears, clean air escapes into the ductwork. Dirty air escapes into the room. Both failures create safety and product quality issues.
The test is not just a formality. It verifies that the collector is handling the design load. A small pinhole in a PTFE sleeve can allow fine dust to bypass the filtration stage. Baghouse seams can dry out and crack over time. Cartridge end caps can warp from heat.
You do not need a lab to catch these issues. You need a clear process and the right tools. This guide walks you through the standard field test. It focuses on safety, isolation, and verification. You can apply these steps to most cartridge and baghouse systems.
Prerequisites and Safety Setup
Before you touch a filter, you must control the energy. A running fan creates a vacuum. Opening the housing under vacuum can suck loose debris into your face or eyes. It can also draw in flammable dust.
- Lock out and tag out the main power to the fan.
- Isolate the air supply if the collector uses a compressed air pulse valve.
- Verify zero energy. Try to start the fan. Confirm the pulse valve does not fire.
- Check the housing for residual heat. Some abrasive dusts stay hot for hours after the process stops.
Gather your tools before you open the unit. You will likely need a flashlight, a pressure gauge, and a leak detection solution. If you are doing a formal test with a blower, you need a calibrated pressure transducer. For a basic field check, a soap solution and a strong light source are often enough to find small leaks.
Wear your PPE. Even with the unit locked out, there is dust inside. Wear a dust mask. Safety glasses protect against falling debris when you lift the lid.
Step 1: Visual Inspection of the Housing
Open the access door or lift the top panel. Look at the filter element first.
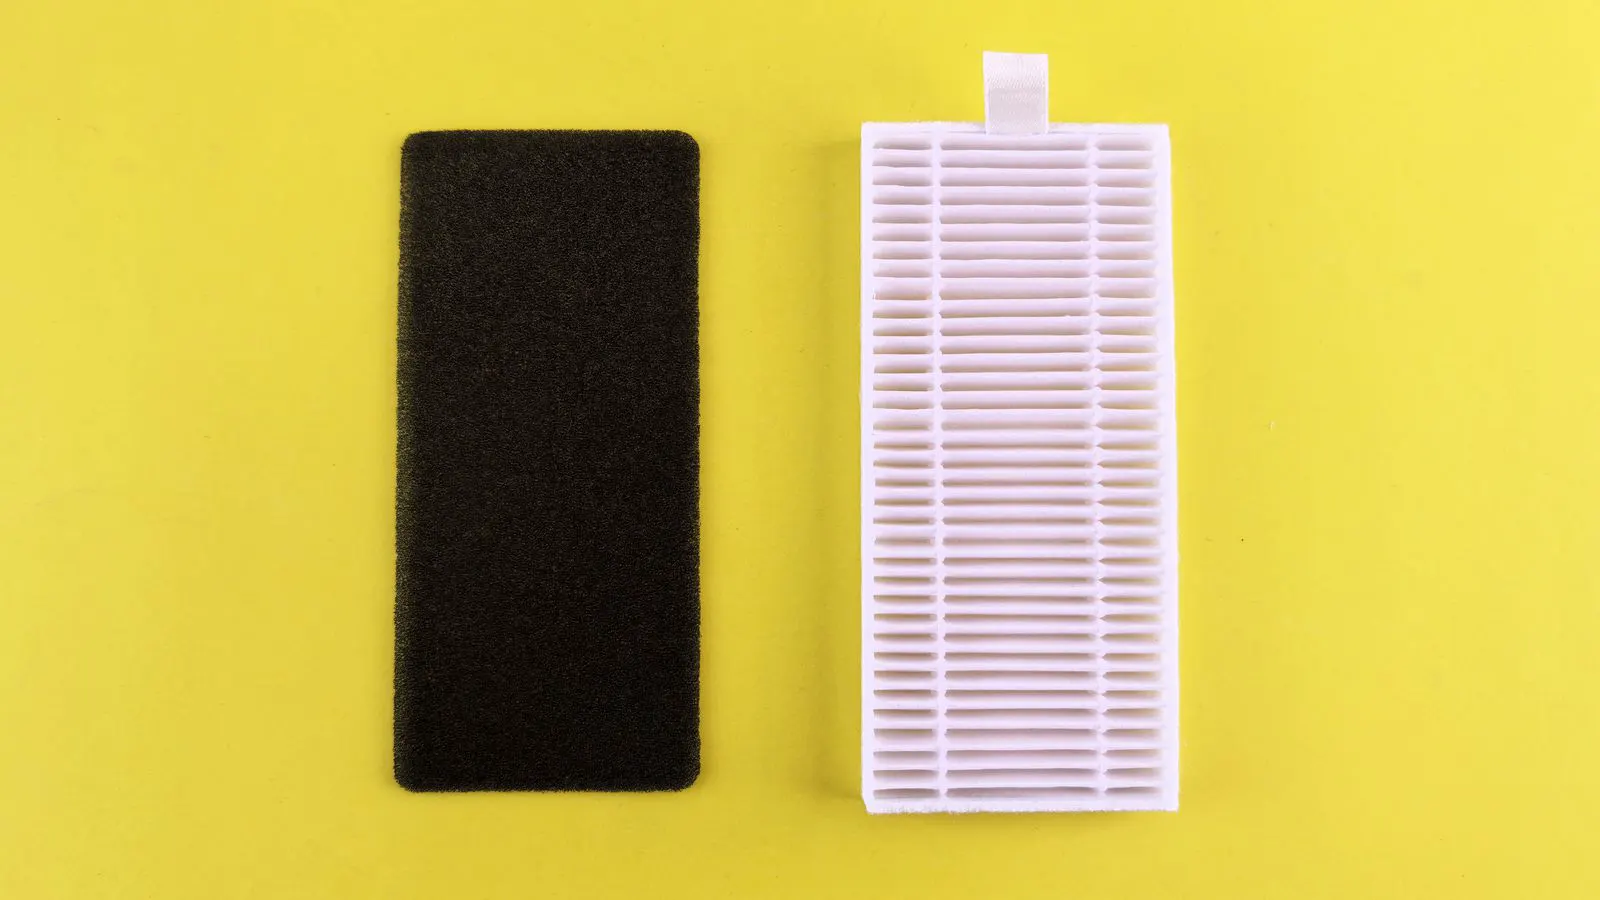
Check the fabric. Look for tears, holes, or abrasion points. Abrasive dust, like metal powder or sand, eats through thin media quickly. If you see thin spots or darkened areas, replace the element. Do not try to patch a compromised filter.
Check the seals. The seal is the most common failure point. It is often made of rubber or silicone. Look for cracks. Look for hardening. A seal that looks like cracked leather will not hold air.
Check the housing gaskets. The gasket between the top panel and the main body often degrades. If it is compressed flat, it loses elasticity. Replace it if it shows signs of wear.
Step 2: Inspect the Seal Interface
Focus on the interface between the filter and the housing. This is where air bypasses the media.
For baghouses, check the pleats at the top and bottom. The top pleats often get crushed by the blower pressure. If the fabric is flattened against the metal, the seal is gone. The air finds the gap.
For cartridge filters, check the end caps. The seal is usually a gasket or a molded rubber ring. Pull gently on the cartridge. It should move freely. If it is stuck, the gasket is likely compressed or damaged.
Look for dust buildup at the seal. If you see a ring of dust around the edge of the filter, it means air is bypassing the media. The dust is being pulled around the edge instead of through the fabric. This is a clear sign of a leak.
Step 3: Pressure Drop Check
If the unit is still locked out, you cannot check pressure drop. You need to restore power for this step.
Restore power to the fan. Do not start the pulse valve yet. Let the fan run for five minutes. This allows the system to stabilize.
Connect a portable pressure gauge to the static pressure tap. Most collectors have two taps. One is upstream of the collector. One is downstream. The difference is the pressure drop.
If you do not have a tap, use a handheld gauge with a hose that fits into the inlet or outlet duct. Be careful with hot air. Use a hose rated for the temperature.
Compare the reading to your baseline. You should have recorded the pressure drop when the collector was new or after a cleaning. If the pressure drop is higher than the baseline, the filters are clogged. If it is lower, you have a leak or a bypass.
Step 4: Leak Detection with Soap Solution
This is the most common field test for small leaks.
Mix a few drops of dish soap with water. Dip a brush into the solution. Apply it to the filter seals.
Watch for bubbles. A bubble means air is escaping.
Start at the top of the filter. Work your way down. Check the entire perimeter. Check the gasket where the filter meets the housing. Check the end caps on cartridge filters.
If you find a bubble, mark it. You need to fix the leak. Do not just clean the area. The seal needs replacement.
Step 5: Blower Test for Critical Applications
If the soap test is inconclusive or you need a documented result, perform a blower test.
This test requires a blower that can apply a specific air pressure. You must follow your manufacturer’s instructions for the pressure level. Do not guess.
Attach the blower to the collector inlet. Close the outlet. Apply the test pressure. Monitor the gauge.
Watch for a drop in pressure. A stable reading means the seal is good. A dropping reading means air is escaping.
This test is more rigorous than the soap test. It catches very small leaks. It is also safer for some applications where you cannot open the housing easily.
Step 6: Document the Results
Write down what you found. Note the pressure drop. Note any leaks you found. Note any repairs you made.
This log is part of your dust collector maintenance. It helps you track wear. If you see the same seal failing every time, you need to look at the design or the installation.
Keep the log with the other maintenance records. It provides a paper trail. If there is a dust incident, you need to show that you performed regular checks.
Common Mistakes to Avoid
- Skipping the Lockout: Never test a live unit without isolation. A vacuum can be dangerous.
- Ignoring the Seal: Most leaks are in the seal, not the fabric. Check the rubber first.
- Using the Wrong Pressure: Do not exceed the manufacturer’s rating. Over-pressurizing can rupture the media.
- Not Replacing the Gasket: A new filter on a old gasket is a waste of money. Replace the gasket at the same time.
- Assuming the Test Passed: If you see dust at the seal, it failed. Do not argue with the evidence.
Final Verification
After you have made any repairs, you must verify the fix.
Run the fan. Check the pressure drop again. It should return to the baseline.
Check the seal again with the soap solution. Make sure there are no bubbles.
If the pressure drop is still low, you have a problem. Check for a bypass. Check for a hole in the ductwork. Check for a failed pulse valve that is not firing correctly.
A good filter integrity test is not just about finding a leak. It is about confirming that the system is working as designed. If you follow these steps, you will catch issues before they become major problems.
When to Call a Professional
Some tests require specialized equipment. If you need a formal certification for a hazardous location, you may need a professional.
If the leak is inside a closed system and you cannot access it, you need a professional. They have the tools to isolate specific sections.
If the pressure drop is erratic, it may indicate a problem with the fan or the ductwork. A professional can diagnose this.
For most routine checks, you can do it yourself. Just follow the safety steps. Lock out the unit. Inspect the seals. Check the pressure. Document the results.
Frequently asked questions
How often should I perform a filter integrity test?
Check the seals and media visually during every routine maintenance service. Perform a pressure drop check monthly. A full blower test is recommended annually or after any major repair.
What does a low pressure drop indicate?
A low pressure drop usually means air is bypassing the filters. This can be caused by a torn seal, a cracked housing, or a hole in the media.
Can I use a pressure gauge if the collector is not running?
No. You need the fan running to create the pressure difference. You can check for leaks with a blower, but a static pressure check requires the system to be in operation.
Is a soap solution effective for finding leaks?
Yes, it is a standard field method for small leaks. It works well for visual confirmation of air escaping around seals.
Do I need to replace the filter if I find a small hole?
Yes. A hole compromises the filtration efficiency. Even a small pinhole can allow fine dust to bypass the media. Replace the element.